Adding an image on screen – Beginning iOS Programming (Post 3)
This post is part of a series on native iOS prototyping.
So now taking custom views a step farther, let’s add a full-screen image to a new iOS project. Because I like to monkey around and get meta, I’ll be adding a full-screen image of an iPhone to our iPhone app.

Press Command + Shift + N in Xcode and create a new empty application and call it ImageView. Press Command + n on the keyboard and create an new class that is a subclass of UIViewController. Go back to the AppDelgate.m file and #import the new ViewController.h file so that the app delegate is aware of the new class.
In the application:didFinishLaunchingWithOptions: method create a new instance of the view controller and add it as the rootViewController.

Making retina images #
Currently for your app to be backwards compatible with older iPhones, iPads and iPod Touches you will need to produce retina and non-retina images. A retina image is twice the size of a regular image, so to create a retina image just double the image’s resolution.
Save your first image at 72 DPI as example.png. Before closing the image file double it’s DPI by changing the resolution to 144. Save this new image as example@2x.png. If your application is running on a retina device then iOS will show on the the @2x version of the image.
Now you need to add the image assets to your project. Do this by dragging and dropping the saved files from you computer into the left pane of your Xcode project. Drop the images only the section that is labeled with the name of your project.

In Add to targets make sure your project’s name is checked and the press Finish.

Adding the image to the image view #
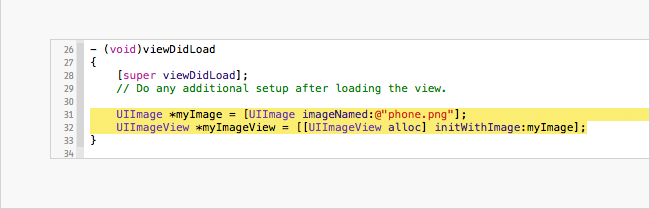
Just like we had to make a CGrect to add to an image view in the last post we’ll have to create a UIImage to add to the UIImageView here. To get started go to your ViewController.m file and type the following in the - viewDidLoad method.
Let’s break this all down.
UIImage *myImage = [UIImage imageNamed:@"phone.png"];
In the first line a pointer called myImage of type UIImage is set to the result of the Objective-C message on the right side of the equals sign. This message asks UIImage to run a convenience method called imageNamed:. An argument in the form of a string containing the non-retina name of the images we just added to the project is supplied. This allocates and initializes this instance of UIImage.
UIImageView *myImageView = [[UIImageView alloc] initWithImage:myImage];
In the second line, on the left of the equal sign, we create a pointer called myImageView of type UIImageView. On the right side we allocate space and run a special init method called initWithImage: to which we provide our new*UIImage* instance called myImage.
Now just one thing remains. We need to add our new UIImageView as a subview of the current window. Since the app delegate called this * viewDidLoad* method it is self. So all we need to do is grab the window’s view and run it’s addSubView: method.
[self.view addSubview:myImageView];

Run it, cause it’s all done! Grab the files for this project on Github. Up next we’ll make a scroll view and add a super long image to it.