Custom views – Beginning iOS Programming (Post 2)
This post is part of a series on native iOS prototyping.
UIView is the smallest unit used to build a user interface in iOS. UIViews can have other views embedded in them to construct a hierarchy of multiple views on one screen. Let’s create a custom UIView in a new Xcode project.
So press cmd + shift + N and create a new Xcode project. Name the project and pop open that AppDelegate.m file. Change the window background color to red. We’ll do this to prove that we’ve later covered the background screen with our own UIView.
self.window.backgroundColor = [UIColor redColor];
Run it and you’ll see our red iPhone screen in the simulator.

Creating a new class #
Next, press cmd + n to create a new file that we will add to the project. In the popup window select Cocoa Touch in the left column and Objective-C class in the template selector area. Click Next.

Fill in the Subclass of heading with UIViewController. This means that your class becomes a subclass that inherits all of the methods and properties that Apple created in the class named UIViewController. Make sure to name your class something descriptive. For this generic exercise I’m just going to name mine JRSMyViewController. JRSMyViewController will contain all of the code that we add to it, and will also inherit all the code from UIViewController. Click Next.

Finally, you’re ready to save your new view controller to the Xcode project. Make sure that your project is highlighted at top and that your project is checked in the Targets box. Click Create.
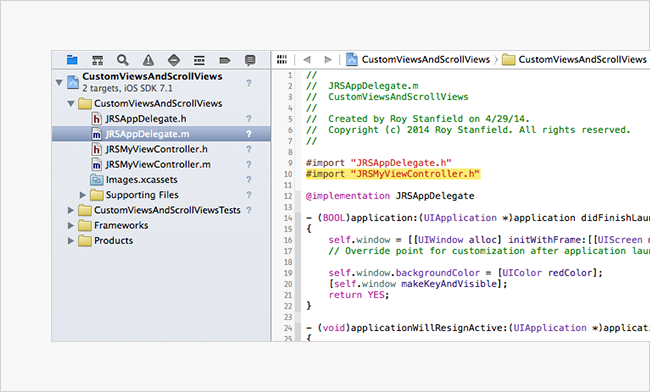
You can now see your MyViewController in the left pane. So let’s get the rest of the project setup so that it becomes useful. First we need to let the app delegate know that there is a new view controller in town. We can do that by importing MyViewController.h (just the header file) into AppDelegate.m (the implementation file). Open AppDelegate.m and type the following – replacing the first 3 letters – near the top of the file near the other import statements.
#import "JRSMyViewController.h"
Creating an instance of our new class #
Next in the app delegate we need to create an instance of JRSMyViewController and add it to the rootViewController. The code looks like this:
JRSMyViewController *experimentalViewController = [[JRSMyViewController alloc] init];
self.window.rootViewController = experimentalViewController;
On the left side of the equals sign – also known as the assignment operator – you see I’m creating a new pointer called experimentalViewController of type JRSMyViewController.
On the right side of the equals sign we see 2 nested messages. The deepest set of brackets contains a method called alloc that sets aside a space in memory that is the required size of a single instance of JRSMyViewController. init takes that space in memory gets it ready for use.
Right now the window object controls the screen, but we want experimentalViewController to. In the second line from above we set self.window‘s rootViewController property to our new instance of JRSViewController called experimentalViewController.

Alright so now we have an instance of our class, but let’s do something with it – like color the background – to prove it actually exists.
Showing something in the view #
Go back to the new class’s implementation file. In my case that’s JRSMyViewController.m Find the method called viewDidLoad. This method comes as boilerplate code when creating many interface related classes through Xcode. Add the following just under [super viewDidLoad].
UIView *rect = [[UIView alloc] initWithFrame:CGRectMake(0, 0, 100, 100)];
Here we create an instance of UIView which we’ll call rect – short for rectangle. On the right side of the equals sign we allocate space in memory and then use a special init method called initWithFrame: that takes an argument. Checking out the documentation (by holding down Option while clicking on UIView in Xcode) we can see that initWithFrame: ’s argument is a type called CGRect.

There are many ways to create a CGRect, but one of the easiest for our purposes is to include the C function CGRectMake() at the time we initialize the view. So in our code above the CGRectMake() runs – creating a rectangle that starts at x value 0 and y value 0 and is a 100pts high by 100pts tall – and returns a CGRect value into our Objective-C method (which only accepts CGRect values).
Cool! So we’ve created the rectangle, but now we need to color it. To do that set the view’s backgroundColor property. Again, look at the UIView documentation, but this time scroll to the top and scan the blue links that have the property typed after them.
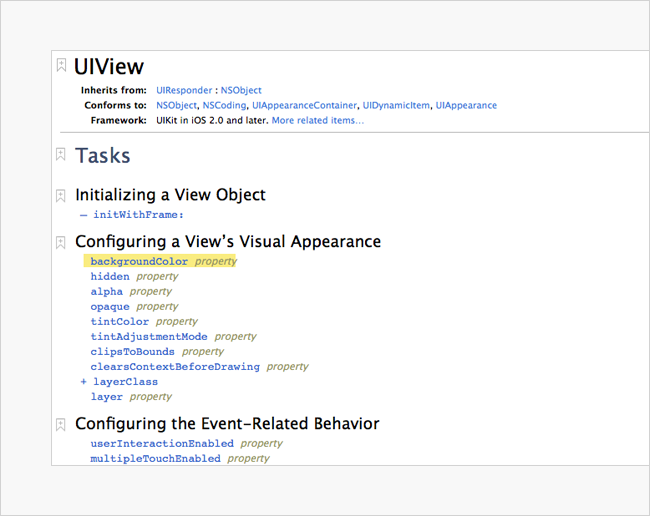
Click the link. It’ll scroll you down to the details of the backgroundColor property. Here Apple has written out the details that they included in their UIColor.h file and we can see that backgroundColor accepts a UIColor. We’ve made one of these before, so this bit a code might be familiar.
rect.backgroundColor = [UIColor blackColor];
So now we have a black background for the rect, but we need to tell the iPhone to draw the view on screen. We can do that by adding our rect to a view that is already on screen. In this case that’s the view that was passed by the app delegate file into the viewDidLoad method. Look back in AppDelegate.m and you’ll see that’s the window. Grab ahold of it in JRSMyViewController by typing self.view. So let’s send self.view a message.
[self.view addSubview:rect];
Run the app and now you have a small black square fixed to the top left of the screen.

Move the rectangle by changing the first two arguments for the CGRectMake function.
UIView *rect = [[UIView alloc] initWithFrame:CGRectMake(20, 20, 100, 100)];

Now, let’s assume that we want to make rect a background that is the size of the screen. We can grab the width and height of the screen by drilling down into our window’s properties. Start with self – which is the window and grab the window’s view. Then grab the view’s bounds, the bound’s size and the size’s wdith like so:
self.view.bounds.size.width
Do the same for the height and you end up with a line of code that looks like this:
UIView *rect = [[UIView alloc] initWithFrame:CGRectMake(20, 20, self.view.bounds.size.width, self.view.bounds.size.height)];
Run the app and now rect is filling the screen with it’s black background color. You can also see that *rect is offset by the 20 points at top and at left.

Awesome! Center it and now you have a your rect sitting on top of the red window background.


Next up, let’s get an image on screen with UIImageView. Grab the project files on GitHub. For the files from this post look at the project titled CustomViewsAndScrollViews. Stay tuned!